
Homemade Smoked Maple Cured Bacon
You might be asking why you would spend the time to smoke your own bacon when there are so many convenient options at nearly every food market. The simple answer is that you get to infuse your own personality into the bacon by choosing the cure ingredients and the wood flavor.
Bacon is made from the fatty pork belly section of the pig. However, you can make bacon from the same cut of a steer, a sheep, and even duck. We are using pork in this recipe. It is most commonly cured in a sugar, salt, and spice mixture for quite a long time. Then is it cooked in a smoker over low heat for a couple of hours.
The cure often includes an ingredient known as either pink salt or Prague Powder. Pink salt has a small amount of sodium nitrite in it. This gives the salt its distinctive pink color. Nitrites and nitrates are said to be carcinogenic to humans in large quantities. They are considered safe in very small quantities. Their purpose is to prevent the growth of anaerobic bacteria, notably Clostridium botulinum or botulism.
If you are someone who spends good money on pasture raised, organic, and heritage breed pork products, you might think twice about adding sodium nitrite to the food you are going to consume. We will explore a bacon recipe that makes the pink salt optional. While the nitrites help to preserve the bacon and give it that distinctive pink hue, you can store your smoked bacon in portions in the freezer to deter the growth of bacteria. Bacon is no longer pink after it has been crisped up in a skillet, so that should not be an issue for appearance.
Making your own bacon can be rewarding. It does take a long time. However, most of that time the bacon, refrigerator, and Masterbuilt Smoker are doing most of the work. When shopping for your pork belly, ask the butcher to remove the skin that covers the fat cap, as well as any silver skin that is on the lean side of the flesh.
Homemade Smoked Maple Cured Bacon
Making your own bacon takes a long time. However the result is so delicious that it's something I really recommend you to try.
Ingredients
- 5 lb pork belly, skinned and trimmed (as described above)
- 1/3 cup maple sugar (can substitute brown sugar)
- 1/4 cup kosher salt
- 2 TBS coarsely ground black pepper
- 1 TBS celery salt
- 1 tsp pink curing salt (optional)
Instructions
- Rinse the pork belly under cold water and pat dry with plenty of paper towels. Place the pork belly on a rimmed baking sheet.
- In a medium mixing bowl, place the sugar, salt, pepper, celery salt, and pink salt (if using). Mix well with a whisk to combine and break up any clumps. Use your hands if necessary.
- Sprinkle half of the dry cure on top of the belly and rub it into the meat with your hands. Turn the belly over and repeat. Place the pork belly and any excess dry rub in a large sealable plastic bag, or wrap completely to seal well in a couple of layers of plastic wrap. Clean the baking sheet with hot soapy water and place the wrapped pork on the pan. Place the pan in the refrigerator on the bottom shelf so that there is no chance of any raw juices leaking onto other food items.
- Cure the pork for 5 days, turning it over once each day to redistribute the accumulating liquid.
- Place the cured pork belly in a clean sink and rinse well under cold water. Pat the belly completely dry with paper towels. Clean the baking sheet, if necessary. And, clean the sink very well with hot soapy water. Place the belly on a wire rack that fits inside the sheet pan. Place the pan back in the refrigerator and allow the pork to continue to dry and cure uncovered for 4 to 8 additional hours.
- Take the pork belly out of the refrigerator 45 minutes before smoking.
- Prepare the smoker. Add the wood chips to the side tray. Fill the water pan half way with a combination of water and apple cider. Open the top vent and preheat the smoker to 175°F.
- Lay the pork belly, fat side up, directly on the middle rack of the smoker. Smoke the pork belly for approximately 2 to 3 hours or until the internal temperature reads 150°F. The exterior shell of the belly should be bronze in color and firm to the touch. Remember to check the water bowl and wood chip tray halfway through the smoking process and replenish if needed. Clean and dry the baking sheet and wire rack well while the belly is smoking.
- Transfer the whole smoked bacon to the wire rack inserted in the baking sheet. Allow it to cool to room temperature so that you can handle it easily. Tightly wrap it in plastic wrap and refrigerate for another 4 to 8 hours.
- Slice all the chilled bacon to your desired thickness. The bacon is not fully cooked at this point. Cook what you want to eat. (See cooking instructions below). And, freeze what you aren’t going to use within a couple of days in tightly sealed freezer storage bags.
Nutrition Information:
Yield: 16 Serving Size: 1Amount Per Serving: Calories: 427Total Fat: 31gSaturated Fat: 11gTrans Fat: 0gUnsaturated Fat: 18gCholesterol: 119mgSodium: 1454mgCarbohydrates: 3gFiber: 0gSugar: 3gProtein: 33g
How to Cook Smoked Bacon
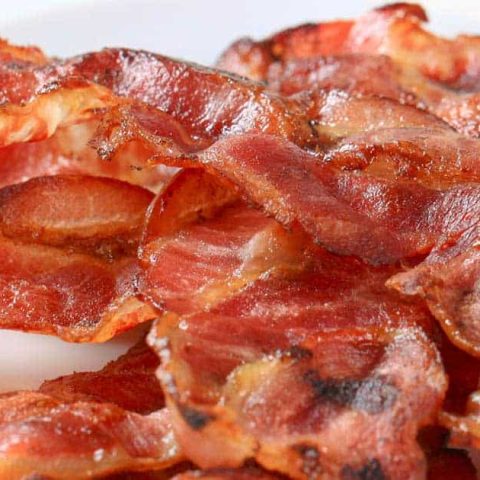
Crispy cooked bacon is a treat all by itself or a great addition to any meal. Think of it alongside a mound of steaming scrambled eggs, piled high on top of a burger, or crumbled over a salad. Cooking bacon might seem an obvious task to many of us. Yet, there are a variety of ways to do it to avoid ending up with limp, fatty slabs. Bacon is best prepared when at room temperature, so take it out of the refrigerator 20 minutes before cooking. Let’s explore 3 options for cooking perfect bacon.
Pan Fried
This method is a fairly classic way of cooking bacon, especially when you only need about 8 slices at a time. A personal favorite vehicle for cooking bacon this way is in a heavy cast iron skillet. The one drawback to pan frying is the grease splatter that is an inevitable by-product. If you have one, use a splatter screen to help with the cleanup.
1. Place the bacon slices in a single layer in a cold, heavy skillet. Cook over medium heat, flipping over a couple of times, for about 8 to 12 minutes until crisp. Then, drain the cooked bacon on paper towels.
2. You can strain the hot fat into a glass mason jar and save it to cook other dishes with later. Sautéed and braised collard greens come to mind.
Oven Baked
This is a great way to cook bacon for a crowd. It is easy and the cleanup isn’t too bad.
1. Line a rimmed baking sheet that has a rack with parchment paper. Place the rack inside the lined baking sheet. Place bacon strips in a single layer on the rack.
2. Place the pan in a cold oven and turn it on to 400°F. Bake until the bacon is crispy for approximately 30 minutes. Then, drain on paper towels.
3. The parchment paper will absorb much of the grease and any solids. Remove the parchment carefully and throw it away. Clean the sheet pan and rack with hot soapy water.
Microwaved
Cooking bacon in a microwave is convenient when you only need a few strips in a hurry. This is ideal for a quick morning breakfast side or an addition to your packed lunch for one person.
1. Line a microwave-safe plate with 2 layers of paper towels. Place the bacon strips in a single layer on the paper towels. Cover the bacon with 2 more layers of paper towels.